
Table of Contents:
DISCONNECT POWER AND CONTROLS
Disconnect the control, power, and grounding cables from the left side of the case.
REMOVE TRIM
Remove the larger trim piece from the case as shown.
REMOVE SCREEN (IF REPLACING A SCREEN)
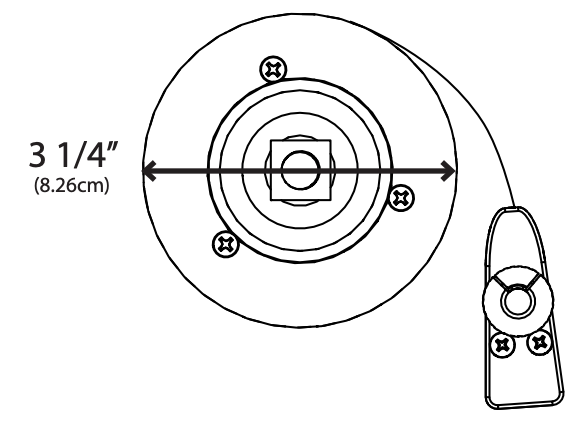
Remove the motor retaining ring from the left end of the case. Turn the teeth on the idler counterclockwise with the included tool to retract the idler. Then lower the screen assembly down and out of the case.
SMALL TUBE
Remove Motor (if replacing a material)
Slide the motor out to get access to the retaining screws. Remove and set aside the retaining screws, then completely remove the motor.
Remove Idler (if replacing a material)
Pull the idler assembly out to access the screws, then remove the screws, and finally remove the idler assembly.
UNPACK REPLACEMENT SCREEN
Open the fanfold box and discard the foam. Then remove the straps and screws from the weight bar cradles. Then remove the screws from the shipping end plates.
WEAR GLOVES WHEN HANDLING SCREEN MATERIAL.
Install Motor
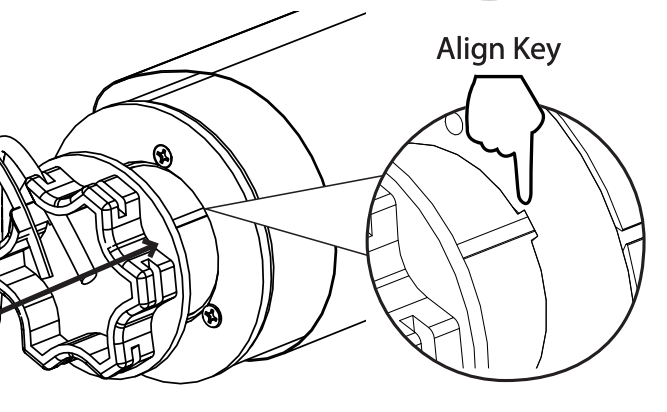
Slide the motor partially into the tube and secure the black plastic piece on the motor to the tube with the Phillips head screws. Then push the motor all the way into the tube making sure to align the key on the motor with the key in black piece secured to the tube.
Install Idler
Slide the idler into the opposite end of the tube and secure with 3 Phillips head screws. Make sure the idler is retracted all the way in preparation for installation into the case.
LARGE TUBE

Remove Motor (if replacing a screen)
Pull the motor assembly completely out of the tube.
Remove Idler (if replacing a screen)
Pull the idler assembly completely out of the tube.
Unpack Replacement Screen
Open the fanfold box and discard the foam. Then remove the straps and screws from the weight bar cradles. Then remove the screws from the shipping end plates.
WEAR GLOVES WHEN HANDLING SCREEN MATERIAL.
Install Motor
Push the motor all the way into the tube making sure to align the key on the motor with the key in black piece inserted into the tube.
Install Idler
Slide the idler assembly into the opposite end of the tube.
INSTALL SCREEN
WEAR GLOVES WHEN HANDLING SCREEN MATERIAL.
Push the motor into the motor bracket at the left end of the case taking care to make sure the motor power and control cables do not become pinched and exit at about 1 o'clock as shown. Then install the motor retaining ring.
Raise the right end up and align the idler shaft with the bushing on the right side of the case, then turn the teeth on the idler clockwise to extend the idler shaft into the bushing hole. Keep turning until you feel the teeth stop.
RECONNECT POWER AND CONTROLS
Plug in the motor control, power, and grounding wires making sure all cables are routed away from the moving tube.
RESET LOWER LIMIT
Plug in the wall switch to any port on the control board, slide the switch on the back to the lower position. Then hold the down button to lower the screen to the desired drop. Once the screen is open to the desired position then slide the switch up to the normal operating position.
RESET UPPER LIMIT
Slide the switch on the back to the upper position. Then hold the up button to raise screen up into the case as shown. When the screen is in the correct position then slide the switch down to the normal operating position.
INSTALL TRIM
Install the trim as shown and test controls to make sure the screen operates properly.
Comments
0 comments
Please sign in to leave a comment.